Showing posts with label Photoshop. Show all posts

Thursday, 1 October 2009

090930 Skyscraper 03

I have been working on Skyscraper 03 for more than 12 hours and finally I've got the scripts working, STL ready, and renderable. Pretty happy about the result to be honest. And hopefully the 3d-print will work perfectly fine for my 1:1000 model.

I will go through the process from here on.


Imported the mapped-points-drawings into AutoCAD which the acquirement of points have been illustrated in the previous post.


Started mapping up the highlighted points using dots and crosslines.


Here's the results for the 4 categories


I decided to use square panel for the dots. The facades of the tower are also laid out with 10m x 10m square grids


Array across the panels with the 4 block panels. Rotate them to give more variations on the facades


It seems that 10m x 10m will contain a lot of points. So I made the grid to 20m x 20m and the density of points is just about right


Import the dwg/dxf file into Rhino


Applied Voronoi-2D script on facade and started to create some floor plates.


The wireframe generated by Voronoi-2D is then imported to 3ds max for piping (i.e. making from lines/curves to solid/mesh)


Isolated the wireframe to reduce memory usage for Scripts


I have modifed the script that I wrote in the previous post. This script is more simple. What it does is considering
-> each cell as individual
-> offset curve inward
-> CurvethroughPolyline
-> clean up the scene
This script can be made much better in terms of the return and the input variables.


Then I did a simple PlanarSrf command by selecting all curves in the scene to create the cutout surfaces


I wrote another script for this particular move - Extrude each surface to its normal.
Each surface has their own normal of extrude. If you type in ExtrudeSrf and select all the surfaces, you might encounter a problem where some surfaces might extrude along the construction plane which is undesirable. So this script does:
-> enter extrude height value (preset Cap and Both sides prior to runscript)
-> considering each surface
-> extrude individually via its normal
-> clean up the scene
It runs quite a while and this is the result with a thickness for the "membrane"


This image shows the combination of the primary cell structure + the membranes


Playing with the shapes of the floor plates


And stack them up with a rotating configuration. The idea here is to create some double volume spaces.


Here is the overall model!


Import the whole model into 3dsmax for basic renderings


Rendering in process... and below are the resulting renders.


I like this render the most.

Wednesday, 30 September 2009

090930 Point Mapping

I proposed a hypothesis for these towers.

If the twin towers are going to be a very iconic and striking buildings in Perth, It has got to have a bit of reference of the city itself.

To generate Voronoi Cells, you need points and a boundary. The points are the extracted node points of the city in four categories - Traffic Junctions, Open Spaces, Commercial, Entertainment/Tourists.

Here are the point maps of the city, and these will give the "randomness" of the points on facade.


Traffic Junctions


Open Spaces


Entertainment/Tourists


Commercial


Overall

Saturday, 26 September 2009

090926 Tutorial 09

In this tutorial, we were to finish up the previous 3d modelling from last tutorial and to create front and back renders + a slideshow presentation in class.


The original image "reflected arrow" by Jeffrey Smart


Front render with pshop post-editing


Back render without editing

For the presentation process slideshow, please click here for the pdf file.

Sunday, 20 September 2009

090920 Tutorial 08

In the previous tutorial class, we were required to analyse a Jeffrey Smart piece, collaborate with our peers, reinterpret the image, and represent this image with 3d softwares and rendering tools.

The image the our group pick is called "Reflected Arrows" by Jeffrey Smart in 1974. You can see more of his works from here and here.


Reflected Arrows by Jeffrey Smart in 1974

Here are some of the process works:


Setting up scene


Modeling background building


Modeling puddles


Modeling the circular signs


Preparation of political figures to be mapped on to the signs


Abstracting the human figures in the scene


Material palette in 3D Studio Max


Running trial renders with mental ray

Wednesday, 2 September 2009

090902 Tutorial 07

We did a little Foster's Swiss Re model today in exploring the lattice structure on the facade using pre-dominating Rhino and 3D Studio Max.

Procedure 01:
Creating 12 Helix from MAX and importing them into Rhino for cleaning up.
Making sure that all lines are individual entity.


Procedure 02:
Surface the Helix curves --> Facet it --> Edit Poly --> Inset --> Separate Steel and Glass into two entities.


Friday, 21 August 2009

090821 Tutorial 5

Tutorial 5 - we learned how to use very very very very very uber basic ArchiCAD (BIM).
The model that we were required to build was Corb's Domino ...


Step 01:
Build Domino in ArchiCAD 12


Step 02:
Exported the model in *.3dm and rendered in Rhino with V-ray then pshop post-editing.


I find that, exporting BIM model to *.3dm will cause the edge to be slightly rounded. The faceted mesh becomes obvious as you can see in the render (become less obvious after fudging the image in pshop). Perhaps *.obj is better?

Hopefully the next tutorial will learn a little bit of rendering technique in ArchiCAD, will that be as good as V-ray? Let's see ......

090821 Tutorial 4

Tutorial 4 - we were taught to do simple animator in max
One thing I find interesting yet a bit meaningless (maybe there are whole heaps of theory behind which I do not know) is to screen capture animation and do lofting in Rhino ... ...

Anyway, here you go~~~

Step 01:
Screen-capturing in max


I fail to do gif animation in photoshop. I couldn't figure out how to export frames into gif image. Maybe there are some softwares on the web which are free to do gif animation.

Step 02:
Trace elements in 2D-CAD and bring the frames into Rhino for Lofting


Urghh ... actually I made a several lofts. I personally think that lofting across linear looks the best. Images upon request.

Animation:
Sent my setup in max to UWA render farm with scanline + skylight + light tracer setting. No external linked material added. It took 3 hours to render.


Some students may split render in render farm. But it DOES NOT WORK for animation. So do not set split render when you send your animation to the render farm. What you will end up with is 16 sets of horizontal-strip-animations, they just do not combine into one.

090821 Tutorial 3

Suddenly feel like putting up all the tutorial exercises ... bare with me :P

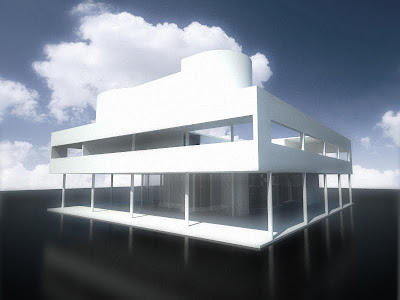
Tute 3: 3d-model for Corb's Villa Savoye

Step 01:
Build the whole model in Rhino


Step 02:
Render with V-ray + Photoshop post-editing